 Create Token
How to Launch a Token on Solana, Ethereum, BNB Chain or Base
How to launch a token step by step: pick a chain, mint or deploy it, fund a pool and open trading — with what's different on Solana and on EVM chains.
Unilaunch Team8 min read
Key takeaways
- Every launch is the same five steps — pick a chain, prepare a wallet, define the token, create it, then open a pool.
- On Solana a token is an account created by a program that already exists — there is no contract to write or deploy.
- On Ethereum, BNB Chain and every other EVM chain a token is your own contract, so it has to be deployed and verified.
- The chain decides what you pay in and how much — cents on Solana and the L2s, tens of dollars on Ethereum mainnet.
- A created token isn't a tradable one — it only has a price once there's liquidity in a pool.
Contents
"How do I launch a token on Solana?" and "how do I launch a token on Ethereum?" look like two different questions, and most guides answer them as if they were. They aren't. The steps are the same everywhere: choose a chain, get a wallet with some of that chain's coin in it, decide what the token is, create it, and put it in a liquidity pool so people can buy it.
What changes from chain to chain is the machinery underneath — whether your token is an account or a contract, what you pay the fee in, and how much that fee is. This guide walks the five steps once, then covers what each of the major chains does differently.
The five steps, on any chain
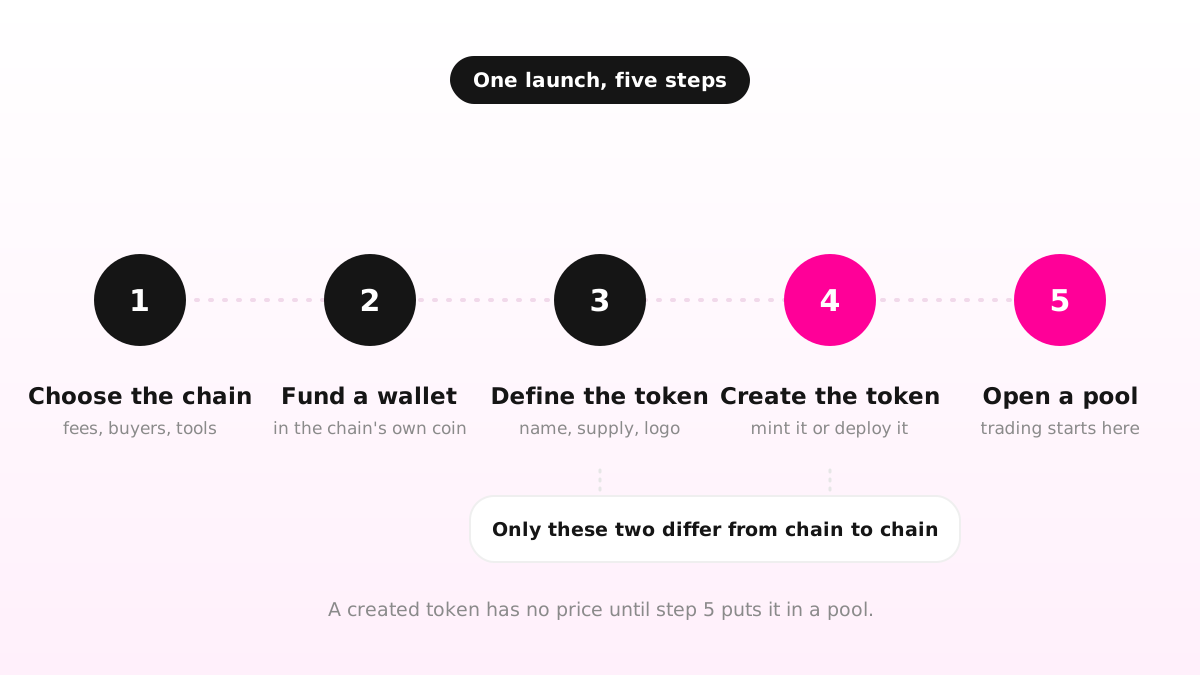
Choose the chain. This decides your fees, your buyers and the tools you can use. It can't be changed later — a token lives on the chain it was created on.
Fund a wallet. You need the chain's native coin to pay fees: SOL on Solana, ETH on Ethereum, Base and Arbitrum, BNB on BNB Chain, POL on Polygon, AVAX on Avalanche.
Define the token. Name, symbol, decimals, total supply, logo and links. Most of this is permanent, so settle it before you sign anything.
Create the token. On Solana that means creating a mint account; on EVM chains it means deploying a contract. Either way you get an address — that address is your token.
Open a liquidity pool. Until your token and a real coin sit in a pool together, it has no price and nobody can buy it. Our guide to adding liquidity and listing on a DEX covers this step on its own.
Steps 3 and 4 are where the chains diverge. The rest is the same everywhere.
Step 1: Pick the chain
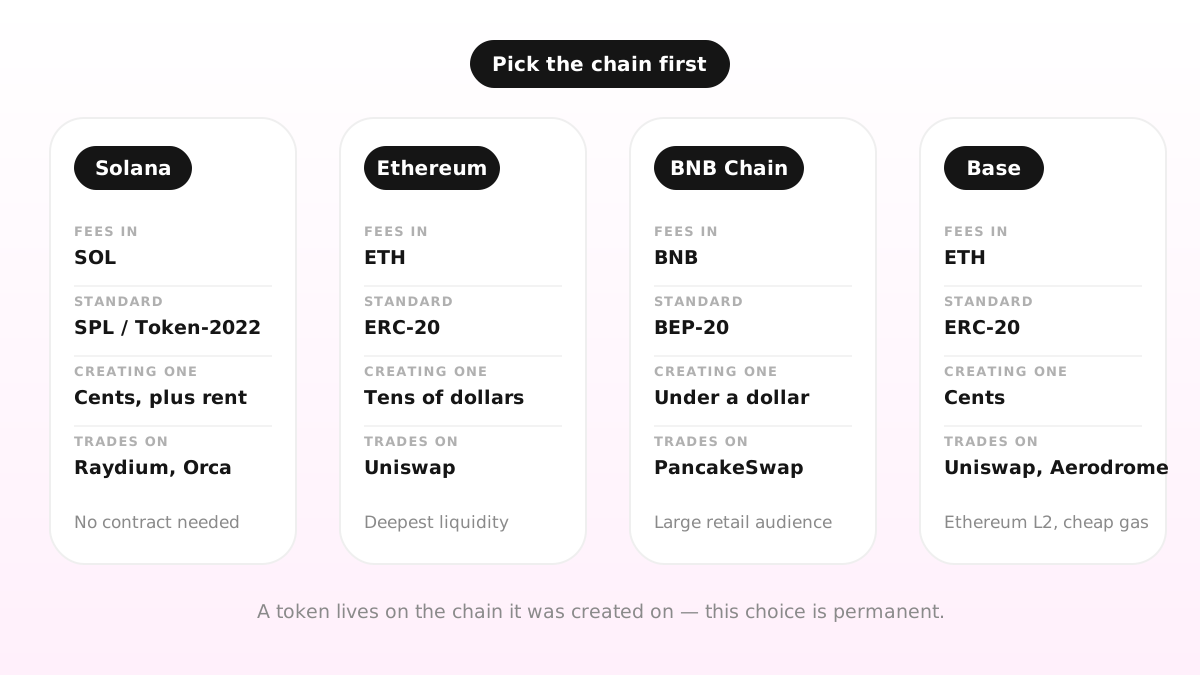
There is no best chain, only trade-offs — cost, audience and what's already trading there.
| Chain | Fees paid in | Token standard | What creating one costs | Where its traders are |
|---|---|---|---|---|
| Solana | SOL | SPL / Token-2022 | Cents, plus small rent deposits | Raydium, Orca, Jupiter, Axiom |
| Ethereum | ETH | ERC-20 | Tens of dollars, more when busy | Uniswap |
| BNB Chain | BNB | BEP-20 (an ERC-20) | Well under a dollar | PancakeSwap |
| Base | ETH | ERC-20 | Cents | Uniswap, Aerodrome |
| Arbitrum | ETH | ERC-20 | Cents | Uniswap, Camelot |
| Polygon | POL | ERC-20 | Cents | Uniswap, QuickSwap |
| Avalanche | AVAX | ERC-20 | Cents | LFJ |
In practice the choice narrows quickly. Memecoins and fast community launches go to Solana or to an L2 like Base, where a mistake costs cents. Projects that want maximum credibility and the deepest liquidity pay for Ethereum mainnet. BNB Chain sits in the middle with a large retail audience and low fees.
How to launch a token on Solana
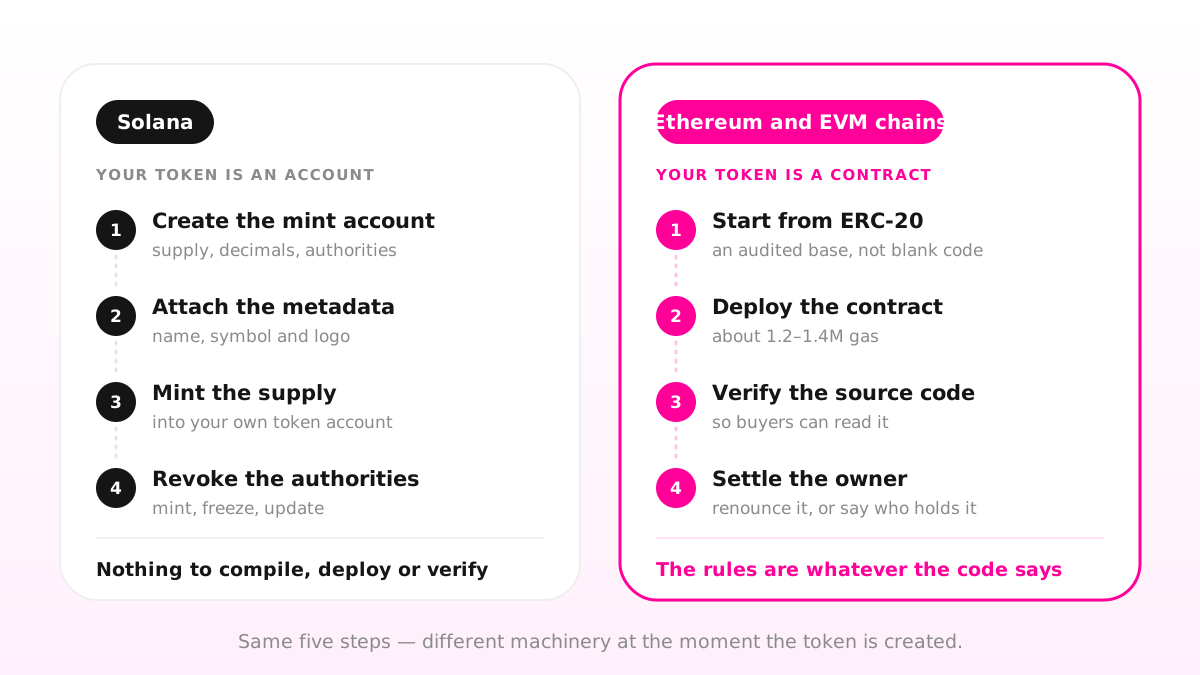
Solana has no per-token contract. The SPL Token program — and its newer sibling, Token-2022 — already runs on the chain, and your token is an account that program owns. Nothing is compiled, nothing is deployed, and there is no source code of yours to audit.
What you need: a Solana wallet such as Phantom or Solflare, funded with SOL.
What happens:
A mint account is created. It stores the supply, the decimals and the authorities. Its address is your token's address.
Metadata — name, symbol and logo — is attached in a second account, following the Metaplex standard, so wallets and explorers show a name instead of a raw address.
The supply is minted into your token account.
The authorities you don't need are revoked.
That last step is the one that decides how your token reads to buyers. A Solana token is created with mint authority (the power to print more supply), freeze authority (the power to freeze anyone's tokens) and update authority (the power to change the name and logo). Leaving them active is the single most common reason a new token is flagged by scanners — see how to prove your token isn't a scam for what each one signals.
The cost. Solana charges a signature fee of 0.000005 SOL per transaction — negligible. What you actually pay is rent: a deposit each account holds to stay alive. A mint account's rent-exempt balance is roughly 0.0014 SOL, and with a metadata account and a token account the on-chain total usually lands around 0.02 SOL. It's a deposit tied up in the accounts, not a fee paid to anyone.
How to launch a token on Ethereum
On Ethereum your token is a contract — a program you deploy and that then belongs to you. That's more power and more responsibility than Solana's model: the rules are whatever your code says, including any you'd rather not have.
What you need: an EVM wallet such as MetaMask or Trust Wallet, funded with ETH.
What happens:
You write, or start from, an ERC-20 contract. OpenZeppelin's audited implementation is the standard starting point — almost nobody writes the token logic from scratch.
You compile and deploy it. The transaction returns a contract address: your token.
You verify the source code on Etherscan, so buyers can read what they're buying.
You decide what to do about the owner — the wallet that can call any owner-only function, such as minting more supply or pausing transfers. Renouncing ownership removes it for good.
The cost. Deploying a typical OpenZeppelin ERC-20 takes about 1.2–1.4 million gas. At 10 gwei that's roughly 0.013 ETH; at 50 gwei during a busy hour, five times that. Gas prices swing hard, so the same deployment can cost $20 or $200 depending on the day — check a gas tracker before you press deploy, and avoid peak hours if you can.
How to launch a token on BNB Chain
BNB Chain is EVM-compatible, so a BEP-20 token is an ERC-20 token in everything but name: the same Solidity, the same interface, the same tools. What differs is the bill and the audience.
Fees are paid in BNB and a deployment costs well under a dollar, which is why BNB Chain carries so many retail launches. Contracts are verified on BscScan exactly as they are on Etherscan, and PancakeSwap is where the trading happens.
The trade-off is reputation: low fees attract volume, and they attract scams. A BNB Chain token gets more scrutiny by default, so verification, renounced ownership and locked liquidity matter more here, not less.
How to launch a token on Base, Arbitrum, Polygon or Avalanche
These four work like Ethereum, because they all run the EVM. The same ERC-20 contract deploys on all of them — only the wallet's network, the coin that pays the gas and the explorer change.
Base is an Ethereum L2 backed by Coinbase. Gas costs cents, and it has become a default home for new consumer tokens. Trading is on Uniswap and Aerodrome.
Arbitrum is the other big Ethereum L2, with deep DeFi liquidity. Uniswap and Camelot are the main venues.
Polygon is a long-established low-fee chain whose gas is paid in POL. Uniswap and QuickSwap lead.
Avalanche pays in AVAX and settles in a second or two, with LFJ as its main DEX.
Since the launch of Uniswap v4 in January 2026, the same pool tooling is available across Ethereum, Base, Arbitrum, Polygon and BNB Chain, which makes moving between EVM chains mostly a matter of switching networks in your wallet.
What a launch actually costs
The deploy fee is the part people quote and the smallest part of the bill. There are three:
The network fee — gas, or Solana's rent and signature fees. Cents to tens of dollars, set by the chain.
The service fee, if you use a launch tool instead of writing and deploying everything yourself.
The liquidity — the real coin you put into the pool. This is almost always the biggest number, and it isn't spent: it stays in the pool as your position, moving in value as people trade.
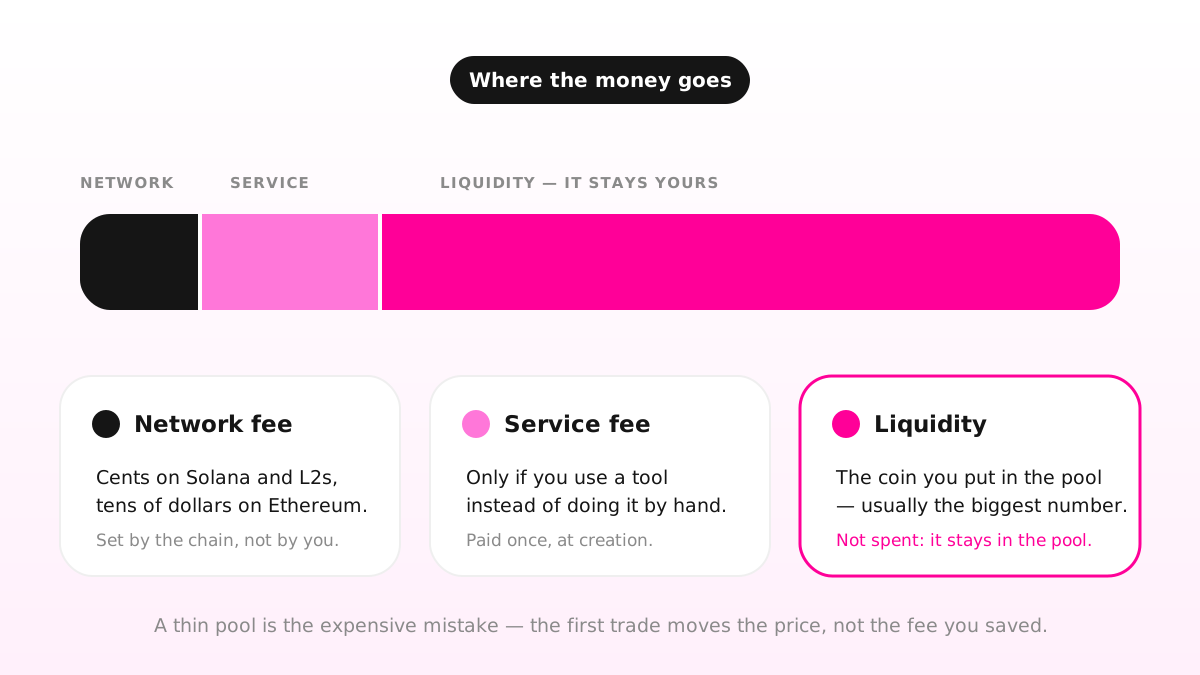
A launch with a $30 deployment and $50 of liquidity is not a cheap launch — it's a pool so shallow that a single trade moves the price by a third. Budget the pool first and the fees second.
Launching without writing any code
Everything above can be done by hand: a script for Solana, Remix or Hardhat for EVM chains, then a DEX interface for the pool. It works, and it takes a wallet, a compiler, a verified contract and several separate signatures to get right.
Unilaunch is the same launch as one form. You pick one of nine chains — Solana, Ethereum, BNB Chain, Base, Arbitrum, Polygon, Avalanche, Blast and Robinhood Chain — fill in the name, symbol, supply and logo, and choose what the token can do. The chain-specific work happens underneath:
On Solana, mint, freeze and update authority are revoked as part of creation, so the token is created clean rather than cleaned up afterwards.
On EVM chains, the contract is verified on the chain's explorer automatically, and ownership can be renounced in the same flow.
The liquidity pool is set up in the same step, at the starting price you choose, with the pool setup included in the fee.
Your token is then submitted where traders look it up — token info on DexScreener, listings on CoinGecko and CoinMarketCap, and the Jupiter and Axiom feeds on Solana.
One fee, paid in the chain's own coin, covers the launch. Tempo and Monad are being added next.
Before you press launch
| Decide this | Why it matters |
|---|---|
| The chain | Permanent. Sets your fees, your buyers and your tools. |
| Supply and decimals | Can't be changed after creation on most setups. |
| Name, symbol and logo | Immutable once update authority is revoked. |
| Which powers you keep | Mint, freeze and update on Solana; the owner on EVM chains. |
| The starting price | Set by how much of each side you put in the pool. |
| How much liquidity | The depth decides how far each trade moves the price. |
| Where the rest of the supply goes | Buyers will look at the top holders either way. |
Work through that list before the first signature, not after. Almost every item on it is permanent, and the two that aren't — the pool and the supply split — are the ones buyers examine hardest.
Ready? Create your token on any of the nine chains, or read the Knowledge Base for the step-by-step version of each stage.
- #token launch
- #Solana
- #Ethereum
- #BNB Chain
- #Base
- #ERC-20
- #SPL token
- #gas fees